Connect a Charger by Ethernet on the Setup Page
A charger connected by Ethernet uses automatic addressing (DHCP) unless you give it a static address. Set it on the setup page's Ethernet page. For cabling and network requirements, see Setup Wi-Fi/Ethernet network connection and Network requirements.
You need the charger's serial number and its local access password. See Open and log in to the setup page. Ethernet settings can't be changed during a charge.
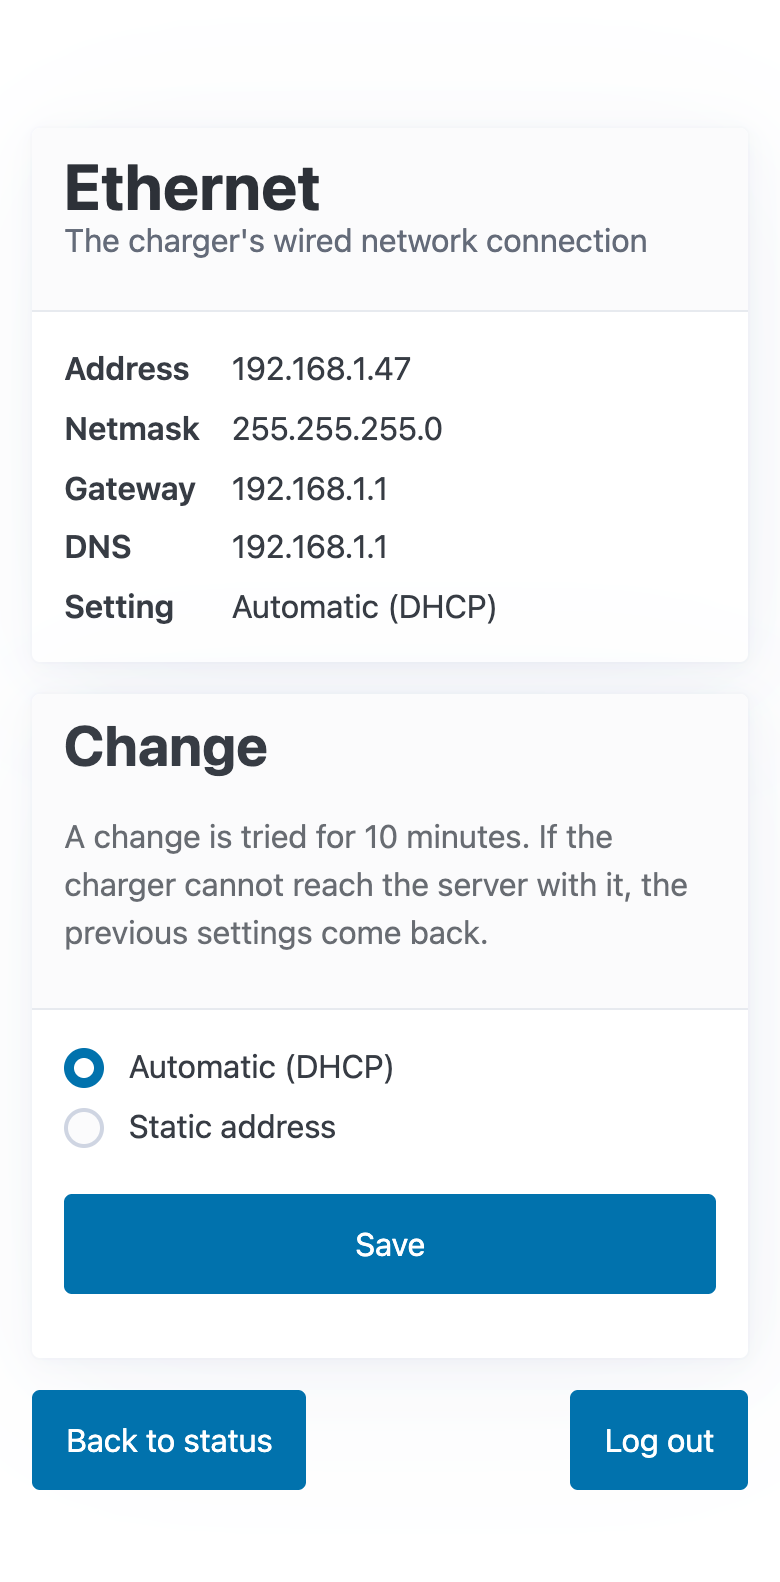
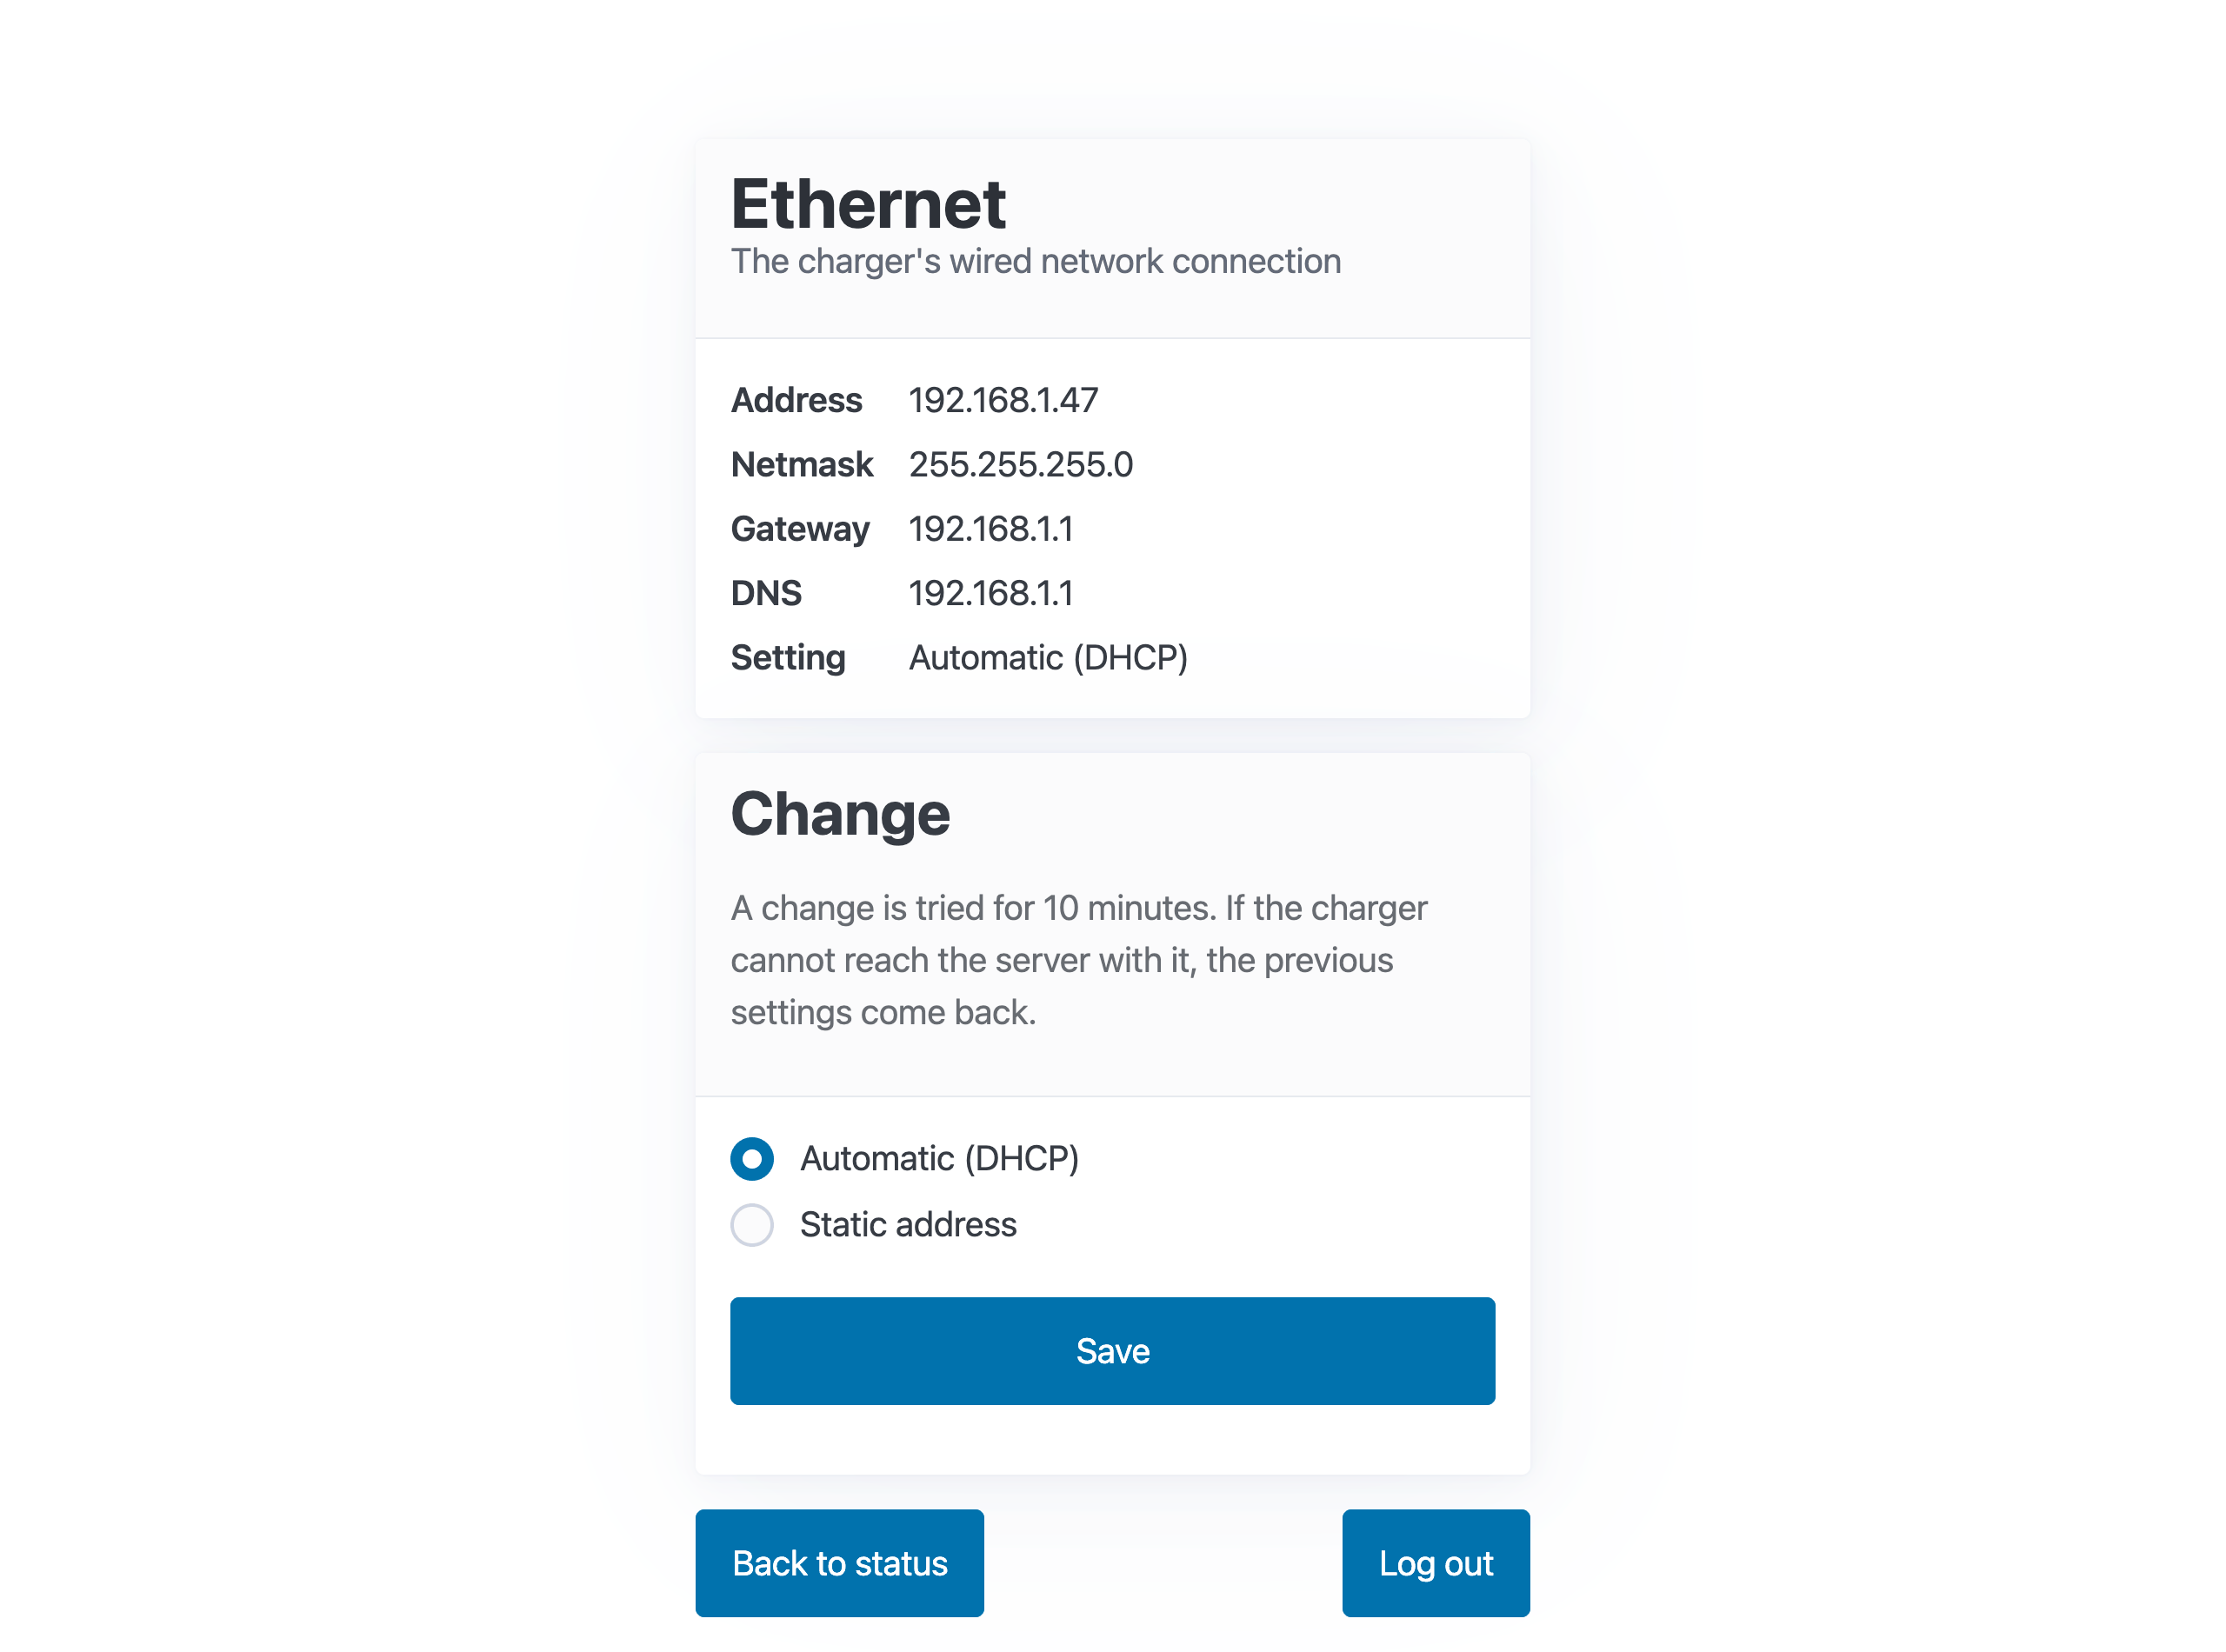
Check the current setting
- Log in to the setup page and tap Ethernet.
- The top card shows the address in use (Address, Netmask, Gateway, DNS) and the Setting: Automatic (DHCP) or Static address.
Set a static address
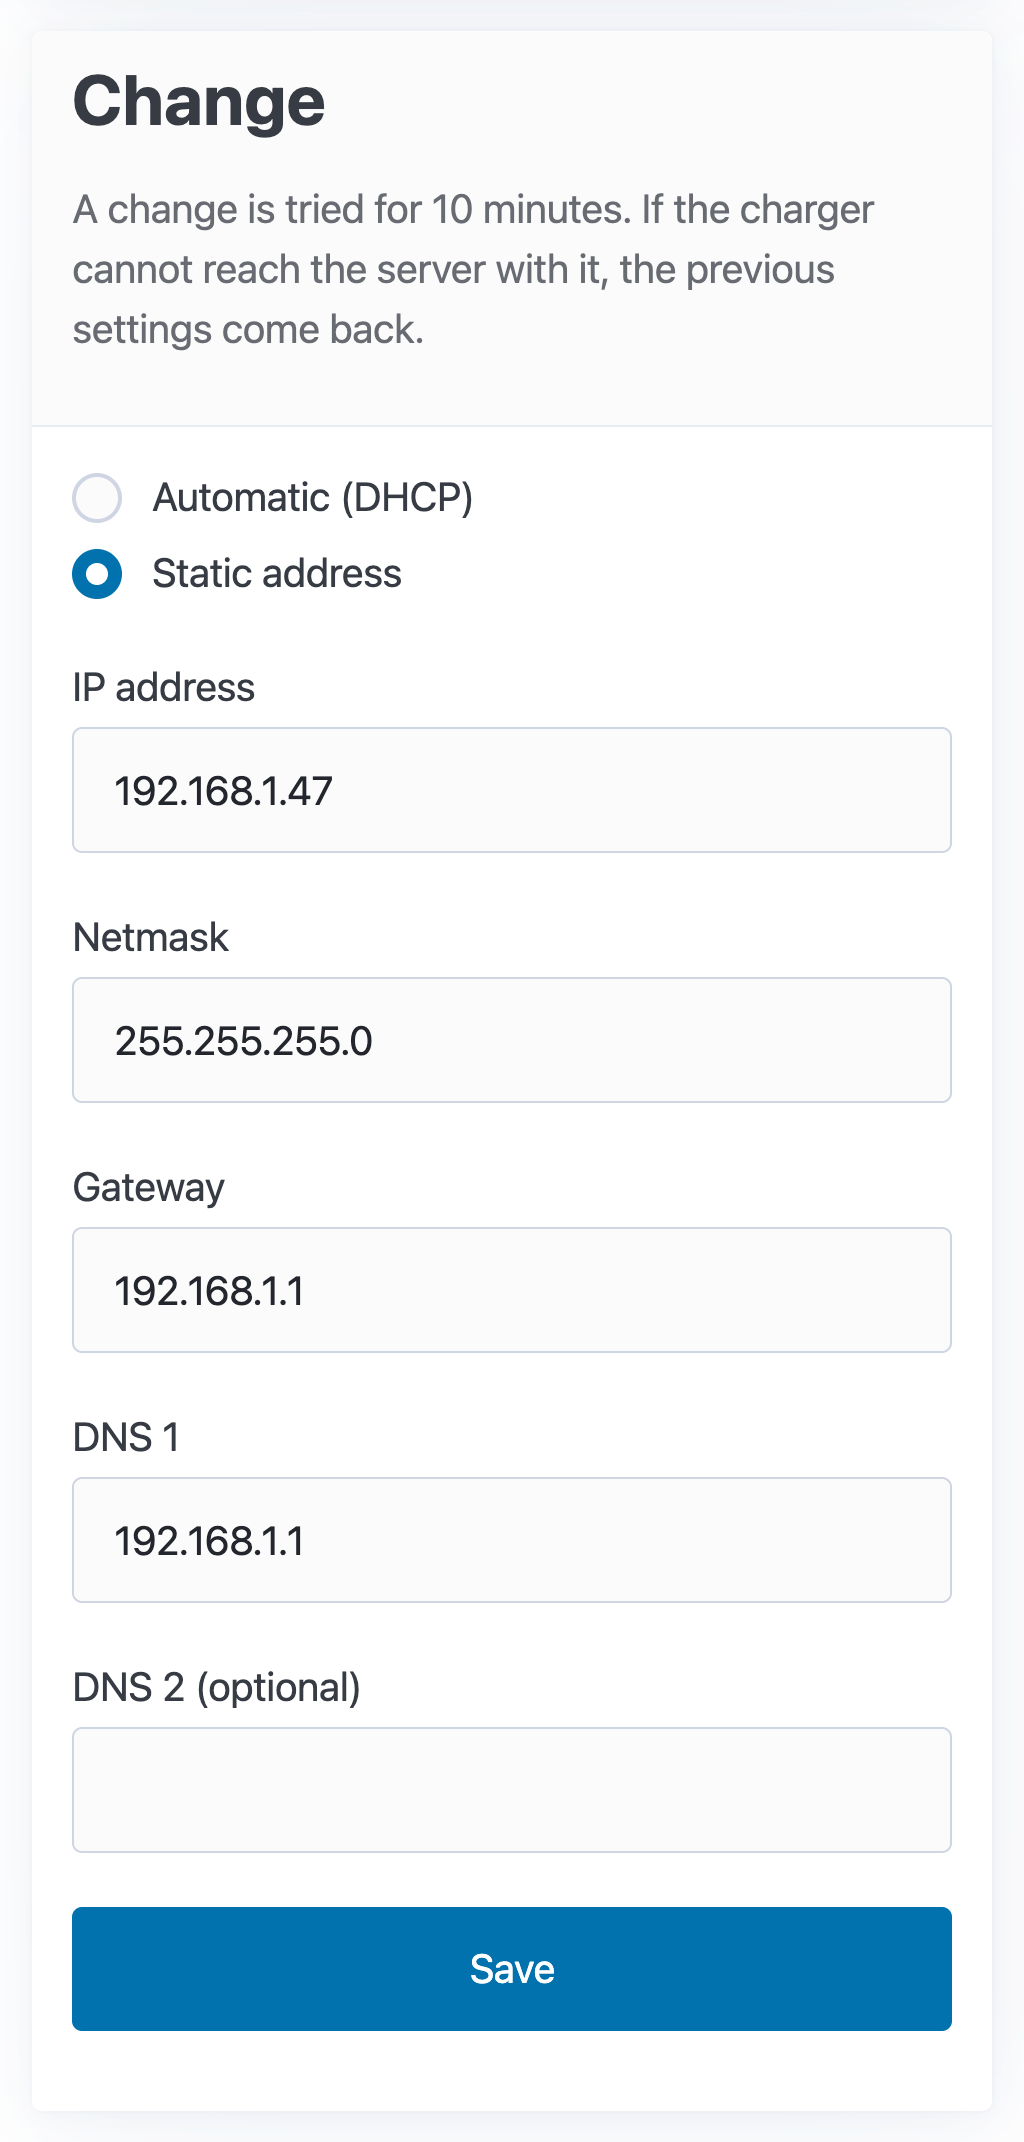
- Under Change, choose Static address.
- Fill in IP address, Netmask, Gateway and DNS 1. DNS 2 is optional.
- The gateway must be inside the charger's network: the same subnet as the IP address and netmask.
- At least one DNS server is needed.
- Tap Save.
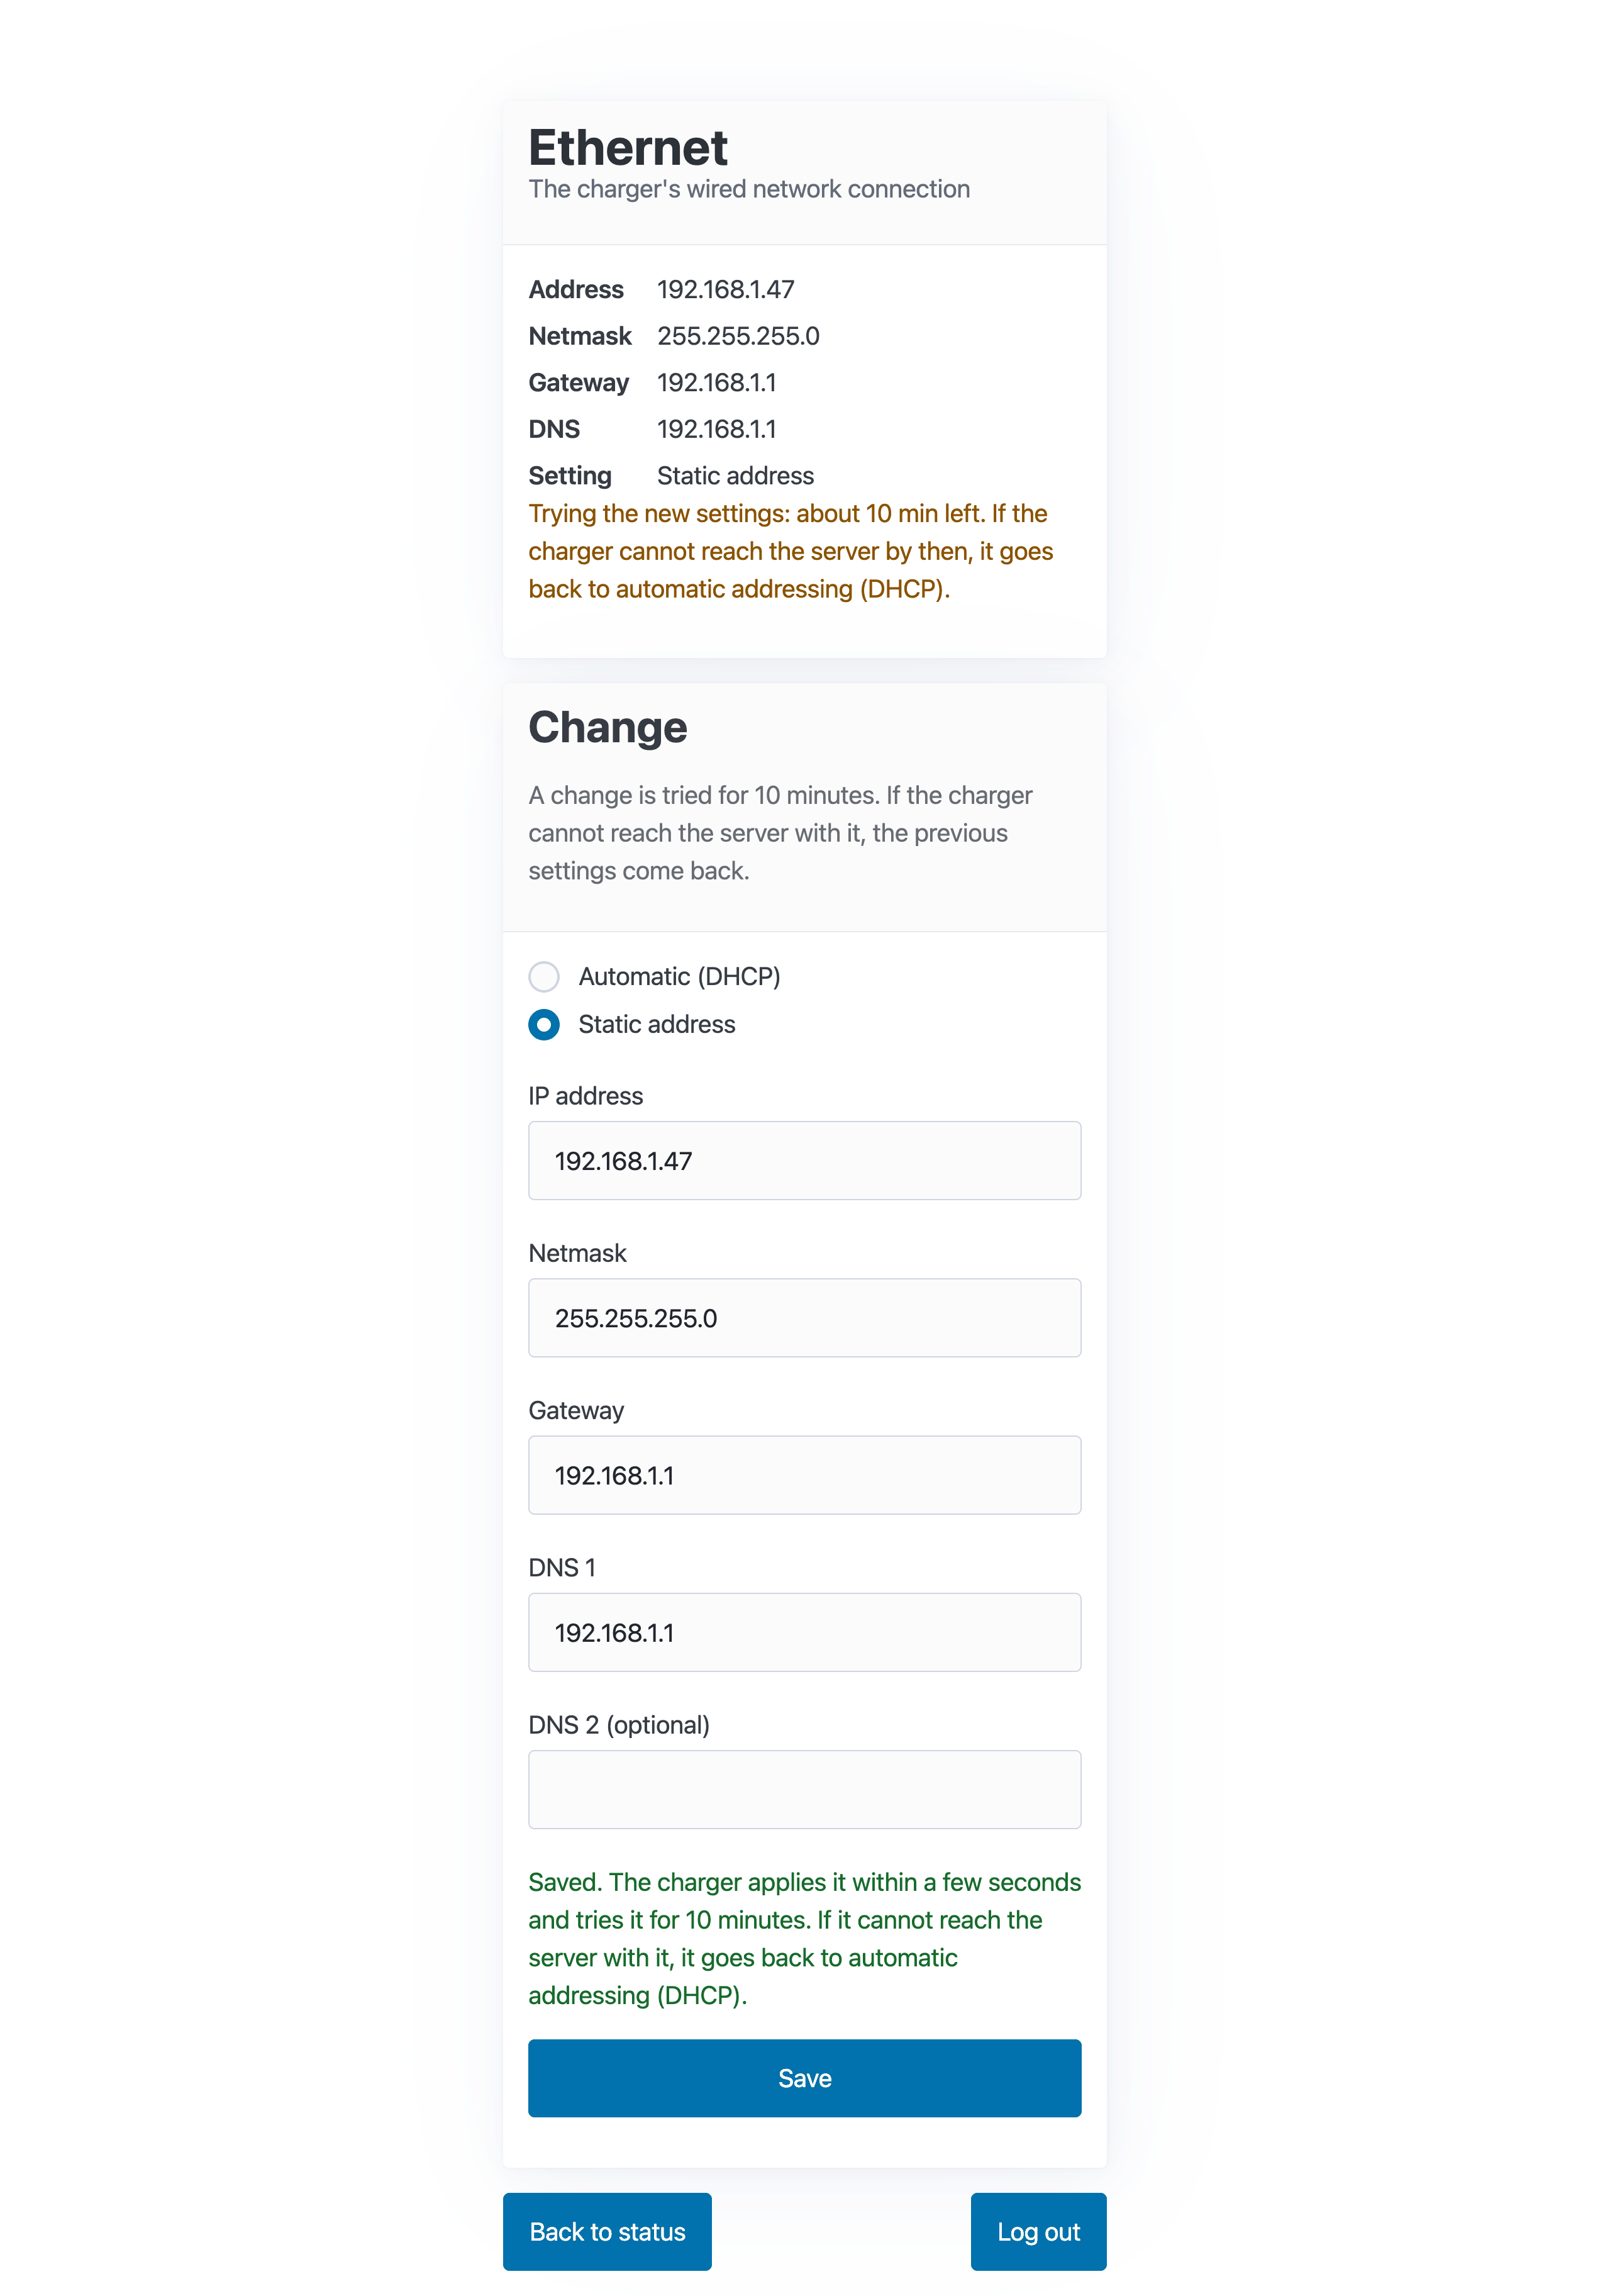
The page says Saved, and the charger applies the setting within a few seconds. If you are connected to the setup page over the same Ethernet network and the address changed, open the page again at the new address, or at https://PlugStream-XXXX.local.
To go back to automatic addressing, choose Automatic (DHCP) and tap Save.
The 10-minute trial
Every change is a trial. The page shows Trying the new settings: about 10 min left. If the charger can't reach PlugStream with the new setting within 10 minutes, it goes back to automatic addressing (DHCP) by itself. A wrong address can't strand the charger.
If the trial fails, the page says so the next time you open it, with the time it happened.
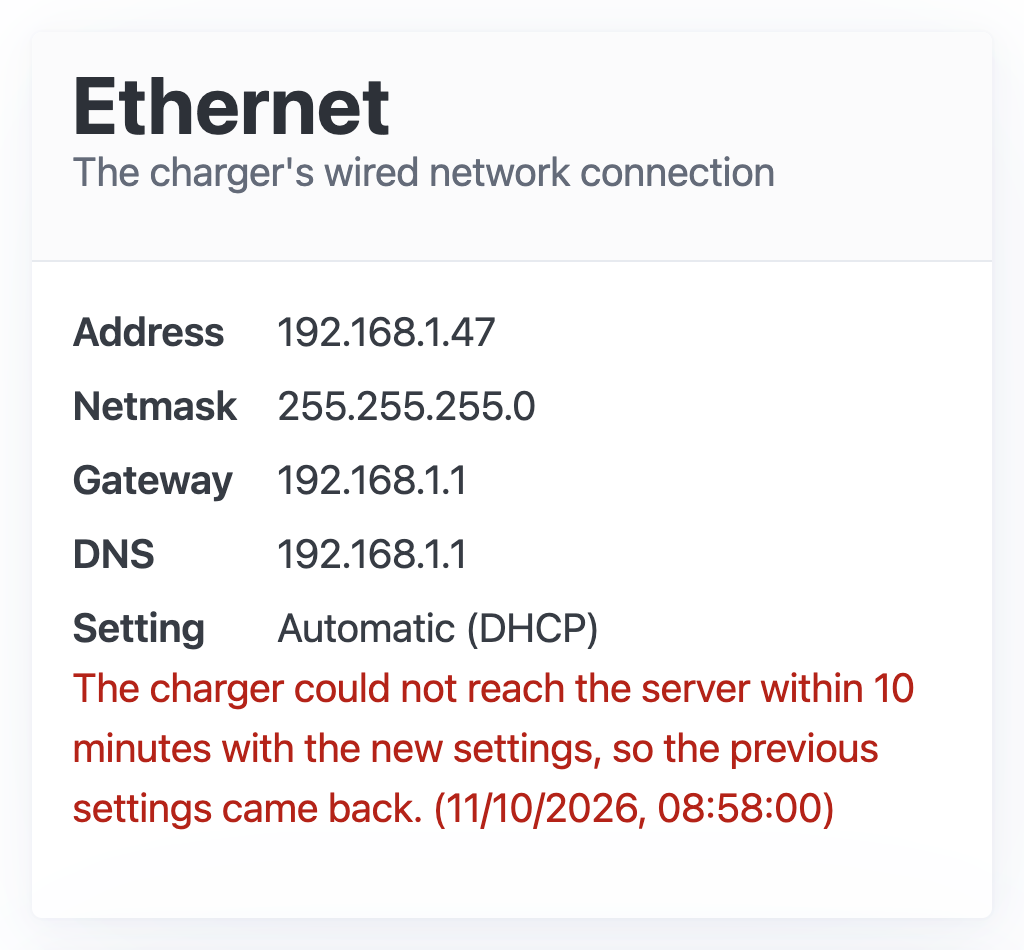
Check the gateway and DNS with the site's network administrator, then try again.
If it isn't saved
The page marks the field and says why, for example The gateway must be inside the charger's network with the network it means.
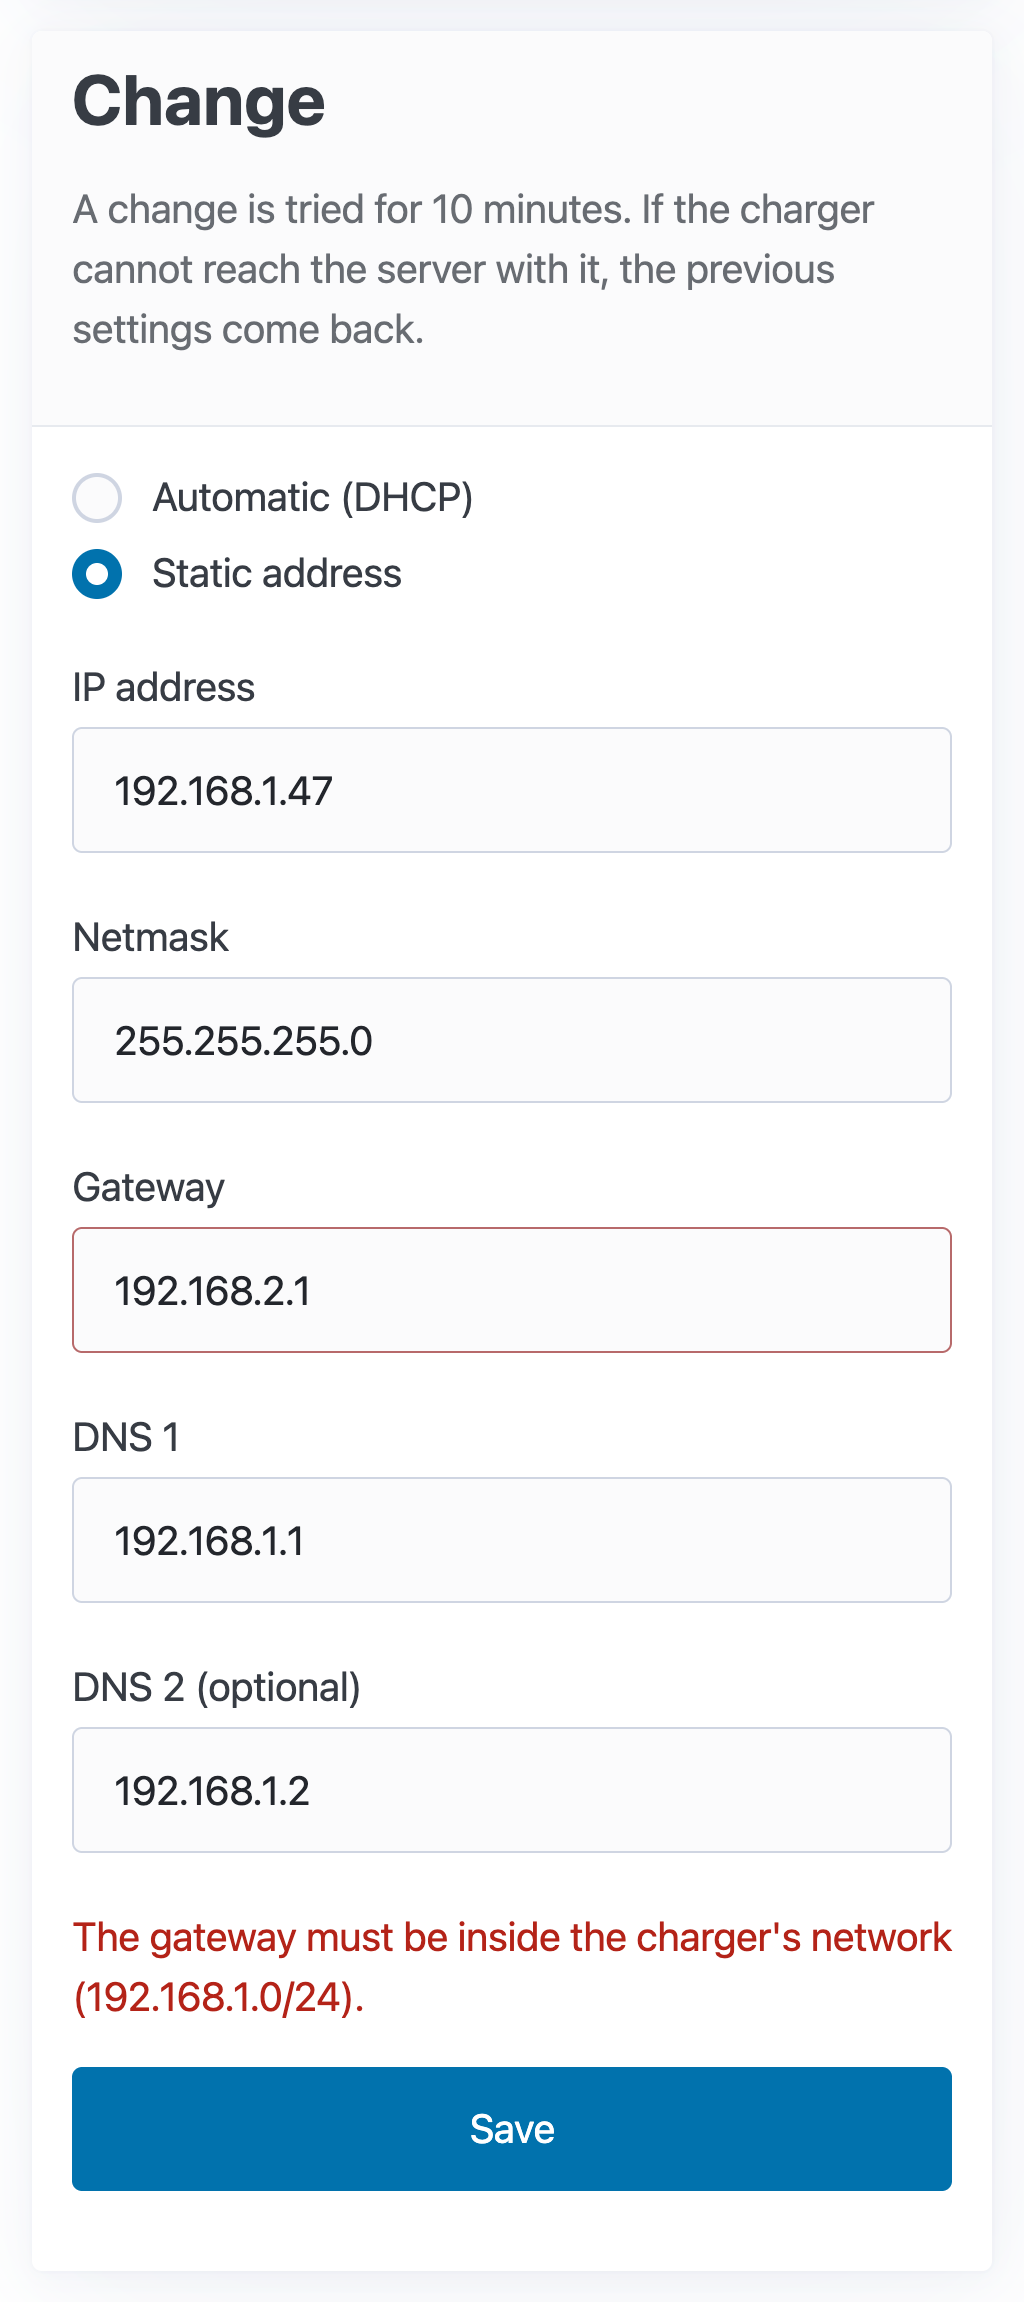
On a phone, the page looks like this: